If you want to use your bike not only in spring and summer but also in the colder seasons, you should definitely consider a few things when cycling through the winter. Your beloved “bike” should be made winter-proof. You can usually do this yourself – a bicycle workshop is not necessary. When you ride an e-bike, there are a few more things to consider – you will learn more about winter check on the bike in the lower part of this report.
Here you can find out everything you need for a winter bike check to get the bike fit for year-round riding.
Contents
Preparation for the winter check
Allow two hours for the bike check. It makes sense to layout or obtain the required materials in advance. This means that repairs/maintenance can be carried out all the faster.
Required materials:
. Lubricant/chain oil
. Bicycle pump
. Tires or winter tires
. Fenders
. Lighting (headlights & taillights)
. Replacement screws for attachments
Required tools:
. No special tools are required – a multi-tool / multifunction tool is completely sufficient.
Time required:
12 hours
First steps in bike maintenance
Expert tips: If you don’t have a truing stand or assembly stand for the bike, simply turn it “upside-down” (saddle and handlebars). Before doing this, put a towel, a plastic bag, or a large piece of cardboard underneath to avoid possible damage to the bike. You can also catch the dirt in this way.
Bike cleaning
The first thing to do is to clean the bike. Use commercially available detergent and water or a special bicycle cleaner. When cleaning, pay attention to the areas of the frame, fork, tires, wheels/rim flanks.
Advice from the expert team: Never use a high-pressure cleaner to wash your bike. Otherwise, it can happen that attachments such as gears and brakes are seriously damaged by such a powerful cleaning, especially since the grease is rinsed from the inner parts of the chain.
When you’ve finished cleaning the bike, look for cracks and scratches; primarily on the following parts:
. Tires and wheels (front and rear)
. Fork, frame, seat post
. Stem, handlebars, handlebar clamps
If you do not notice any damage to the frame or the load-bearing parts during this check, you can now make your bike winterproof with very simple means. However, if you notice any noticeable defects on the bike, it is better to make an appointment at a specialist bicycle workshop.
Now we come to maintenance and repairs, which can be carried out independently with a little manual skill.
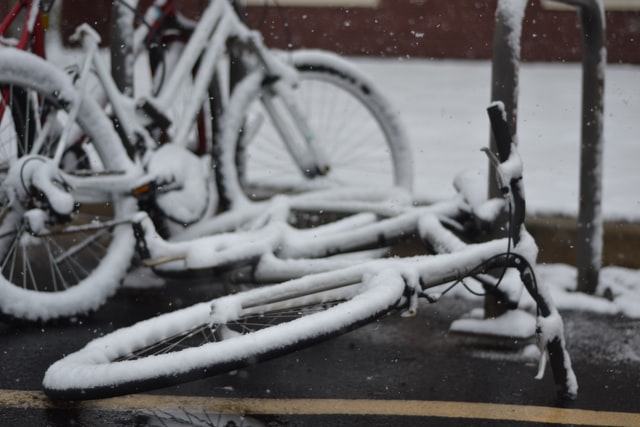
Bear in mind that the alternation of heat and cold can cause the bicycle tires to crack. Especially in winter, when you park your bike in front of the door or in the basement, you should definitely check the condition of the tires at regular intervals.
For the wintertime, there is the possibility of exchanging racing bike tires without a profile (for better rolling resistance) for cyclotrons tires. For trekking bikes or MTBs, you can switch to tires with a lot of profile and/or spikes.
Buying tips from the expert team:
. Schwalbe marathon winter
. Swallow winter spikes
Winter check for the bike brakes
You should of course also check the brakes during the winter check. This is the only way you can guarantee safety for the winter and be sure that everything will work properly. With disc brakes, higher and better braking performance can be found than with rim brakes or V-brakes. Another advantage of disc brakes that should be mentioned is that the brake discs do not get dirty so quickly and heavily – this has a positive effect on braking performance. Also, have pads of disc brakes a longer shelf life than pads of rim brakes. In addition, the wheels can also be used when driving downhill and the like. Do not overheat; in other words, in journeys where you break a lot and continuously.
If you have a trekking bike or racing bike with V-brakes, it is essential to check the brake pads/brake pads. If they have already gone a long way, they need to be replaced immediately. If the brake pads no longer have grooves, this is a good indicator.
With disc brakes, no brake fluid needs to be changed. Only one is bleeding the hydraulic disc brakes necessary if the brake makes a rather vague impression, no longer works properly or the brake lever can be pulled virtually no effect until it stops. To be on the safe side, you should make an appointment in the bicycle workshop for this work and not try to do it yourself. Also, check the brake pads of the disc brakes to see whether they are worn.
Prepare the bicycle chain for the winter
The bicycle chain is a component on the bike that needs the most care. Always remember: the cleaner the bicycle chain, the less friction there can be. This guarantees good mileage and durability.
But before you invest a lot of time in cleaning the chain, it makes sense to first take a look to see whether the chain needs to be replaced. Roughly estimate the mileage of the chain (rough guide value 3,000 km) or see whether you can see any heavy wear.
A chain change can certainly be carried out at home in the bicycle cellar or in the garage, but it is better to have this repair and change carried out by a bicycle dealer you trust. Since the gears have to be readjusted and a chain tool is also required when changing the chain, you should let the specialist work on this. Often it actually makes more sense to only replace the chain after the winter months.
All you need to clean the bike chain is a lint-free cloth (or an old T-shirt) or chain cleaner, WD40, chain oil, or lubricant.
Get ready:
. Lint-free rag or old shirt
. Chain oil, WD40, chain grease, or lubricant
. Chain cleaning brush or toothbrush
How to do it:
. Before cleaning, spray some chain cleaner or WD 40 on the bicycle chain. Turn the crank several times and let it work for 5 to 10 minutes. In this way, the chain is degreased.
. In the waiting time, you can now clean the sprocket set or cassette and the derailleur. To do this, soak the chain cleaning brush (or the toothbrush) with the chain cleaner and then clean the sprocket, derailleur, sprocket, and chainrings.
. When you have removed the dirt from the attachments, you can run the bicycle chain through the rag several times. If you are very dirty, you should repeat this process over and over; until no more oil remains in the cloth.
. After the chain has been cleaned, a lubricant or chain oil should be on the chain again. To do this, apply the oil to the inside of the chain and turn the crank several times again. If necessary, you can remove excess oil with a cloth.
. Finally, a little oil is added to the bike chain on the derailleur, bottom bracket, and rear derailleur.
Mudguards for dry biker bums
Bicycle mudguards are particularly important for the cold and wet weather in autumn and winter. Especially when the streets are wet and dirty and the summer is almost over, you should definitely attach mudguards to the bike so that your clothes, back, and face remain splash-free from the puddles and dirt.
If your bike is already fitted with mudguards, to be on the safe side, check whether they are rubbing at points on the wheel and bend them straight as necessary. Also, take a look at the screws. You should replace rusted screws right away – by the way, this applies to all screws on attachments on the bike.
If no mudguards have been attached to the bike, you have several options:
. Mudguards to attach to the seat tube
. Mudguards to attach to the bike saddle
. Mudguards to screw onto the frame
. Or a luggage rack with a mudguard is retrofitted.
Thanks to the simple plug-in system, which is easily attached to the seat post on MTB, city bike and trekking bike or Mud saver / S-Guards for use on the seat stay of the racing bike seat stay, a simple and inexpensive attachment is possible here.
Biker tip: Even if it is so much fun to drive through the dirt, cleaning after the tour is essential. Always keep in mind that the less mud or moisture gets on the bike and the wearing parts, the more noticeable it is. The less maintenance work you have in spring.
Bicycle light/lighting for the wintertime
The highest priority, especially in winter: “See and be seen”. The elements headlights, taillights, and reflectors, therefore, play a very important role. If you have a dynamo on your bike, check that it is working properly. If you drive with electrical lighting, test the batteries and replace them if necessary. You should also check whether there are enough reflectors attached to the spokes and upgrade if necessary.
If you are not quite sure which type of bicycle lighting you would like to use, take a look at our large and affordable bicycle parts online shop and take a look at our selection of bicycle lights and reflectors.
E-bike and pedelec in winter
If you are out and about on an e-bike and want to ride all year round – even in winter – here is an extra important tip regarding the bike battery:
Handle the e-bike battery carefully; it should not be exposed to extreme heat or very low temperatures. If your bike is in the basement or garage in winter, you’d better remove the battery and take it with you to the warm four walls and store it in the apartment or house in the interim phases – ideally at a temperature of 15 Degree. It is also important to ensure that the battery is never stored completely empty. We recommend a half-full battery.
Winter check tips for your bike
. Cleaning the bike
. Tire control
. Checking the brake pads (disc brake or rim brake / V-brake)
. Clean, degrease and oil the chain
. Install protective plates
. Test the bike lights – replace batteries if necessary
Bike check after winter
If you have got your bike well through the winter, you should carry out a corresponding spring bike check in the spring.